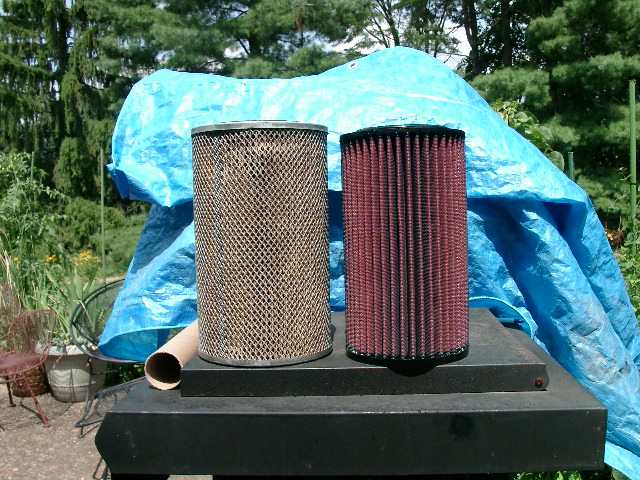
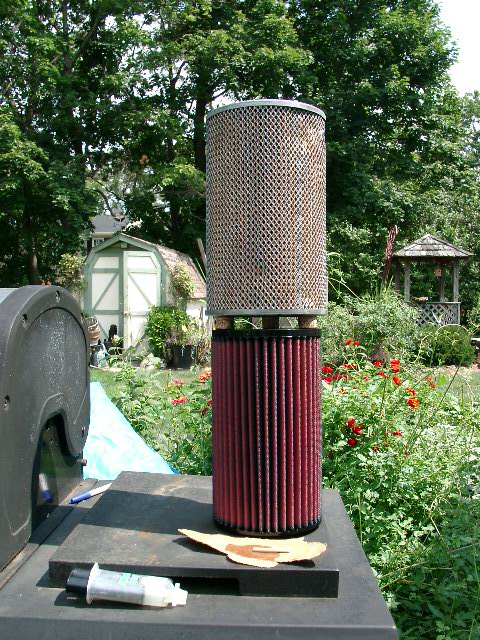
Replacing the OEM Air Filter (Crosland 9088) in a Rolls-Royce
Silver Shadow II with a
K&N E-9244
Step 1: Remove
Existing Filter
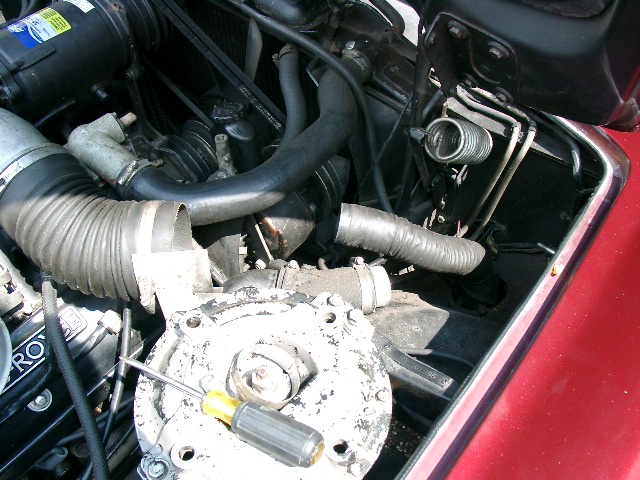
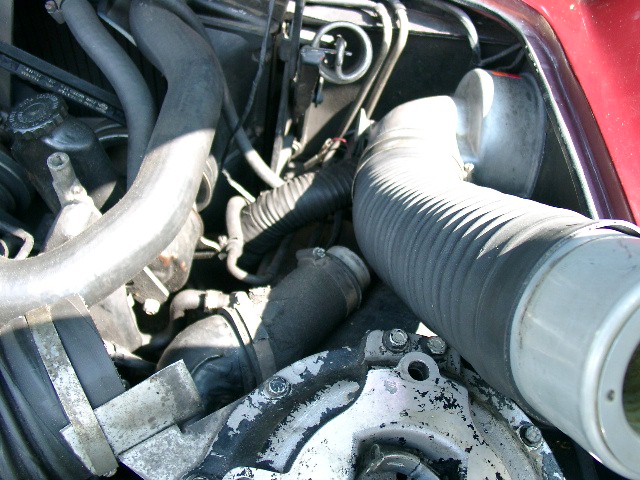
This entails first
removing
the clamp on the small hose beneath the air intake hose (This is the
"heat tube"
hose that runs between an air supply pre-heater intake located over the
exhaust manifold to the main air intake.).
It is
virtually impossible to get out the air filter housing/cover and the
filter itself if this is not
done. After you do
this and move it out of the way,
unscrew the clamp holding the air intake hose to the bracket you see
near the
center of the photo and
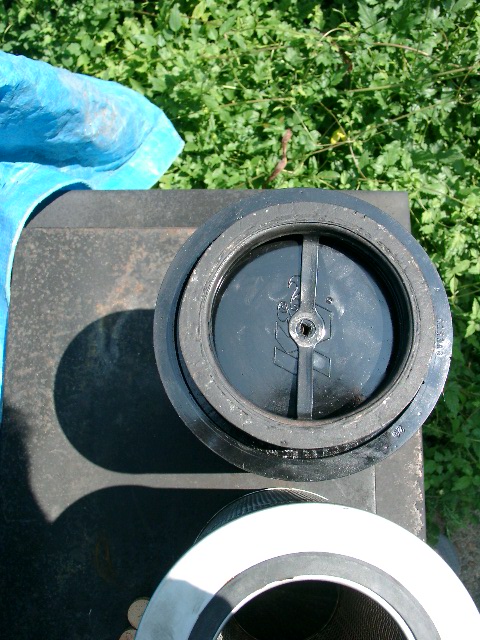
unscrew the knurled knob that holds the air filter housing/cover
on. Once the
cover
is free, lift the cover &
attached hose out. At this point, you will see the large,
cylindrical air filter which
is held in place by a nut and
ring. Unscrew the nut, remove the ring, then have fun getting the
air filter
itself out. You're left with
the mounting rod protruding slightly from the housing; it's peeking out
at
the upper right of the photo.
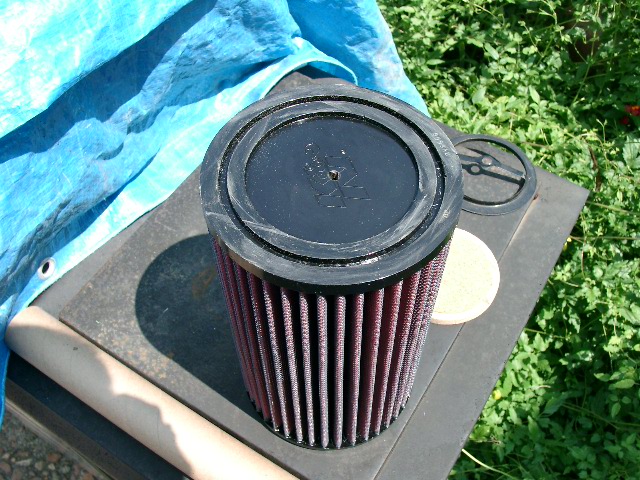
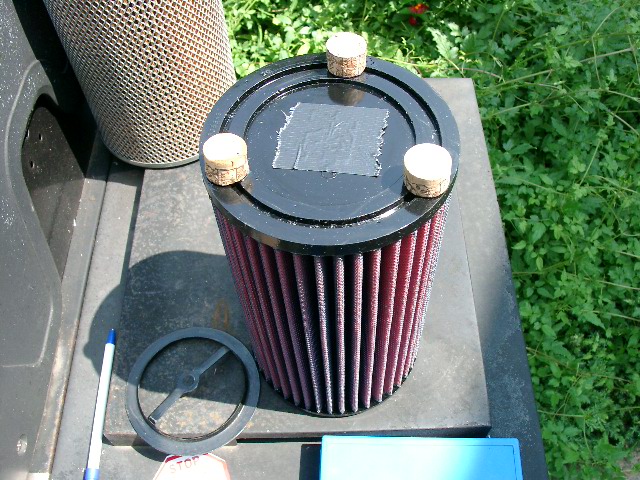
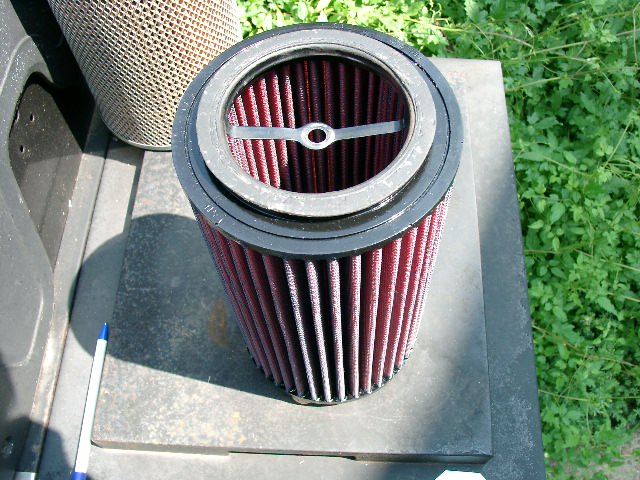
Step 2: Height
adjustment with cork stilts (or
whatever low-heatproof gasketing material you might prefer)
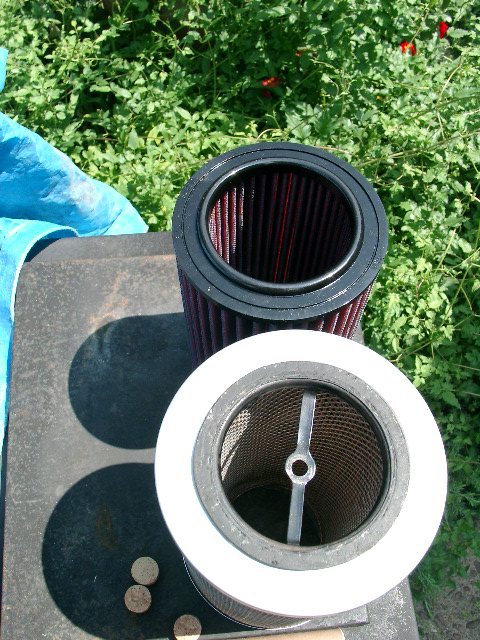
Place
the two
filters side by side on a flat, steady surface with the closed end of
the K&N filter touching
the flat surface. There is a
slight height differential. I made up for this by using cork
stilts made from a
wine cork. One could do this
other ways. I measured each stilt by placing the wine cork on the
K&N
right next to the old filter then
drawing a line by rotating the cork that was at the same height as the
top
of the old filter. I ended up
with 3 of these, which I thought sufficient.
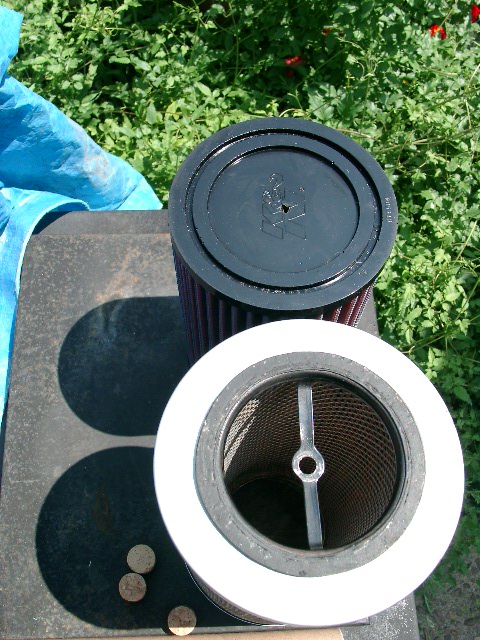
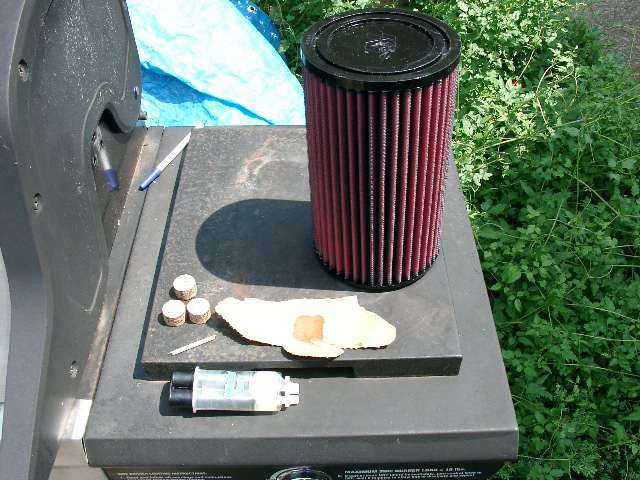
Step 3 - Perforating
the closed end of the K&N
to accomodate the rod.
I used the centering
ring to
locate the center on the K&N then cut a small hole using
an Xacto knife. At first I tried to use an X-scoring instead of a
hole, but upon testing
with a screwdriver that was smaller than the mounting rod, determined
that this was
very likely to become torn/enlarged at the ends of the 'X' with
repeated placing on and
off the rod. Ideally, this hole would be round and just the
slightest bit smaller than the
mounting rod, but I did not have any hole punches available.
Someone pointed out
to me afterward that I could have used a drill to make the hole.
Given the texture
of the filter housing, this is probably true if one uses a wooden
block
directly behind
the closed end of the filter while drilling.
Step 4 - Roughen
the edges of the K&N closed
end to prepare for gluing
The closed end of the K&N is
slighly
oily when taken from the box, and I cleaned this
up with Simple Green. Once the oil is removed, you're left with a
very slick surface
that doesn't hold any sort of glue too well. I roughened the
surface up and then cleaned
off all of the detritus from that operation.
Step 5 - Mix
glue, set cork feet, then weight and
wait.
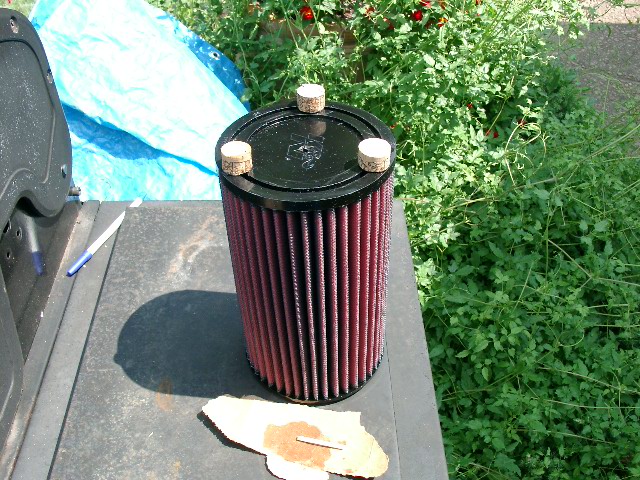
I used 5-minute epoxy for
this. The K&N filter felt entirely
structurally stiff enough for 3 feet, evenly spaced,
to work just fine. Others may want more feet or to use gaskets
of
the correct diameter that stack to the needed
height. The old filter made an excellent weight for the feet
while the glue was setting. It was ready to go in 15 mins.
Step
6 (Optional) - Add tape over hole to
prevent tearing over
time and create a better seal
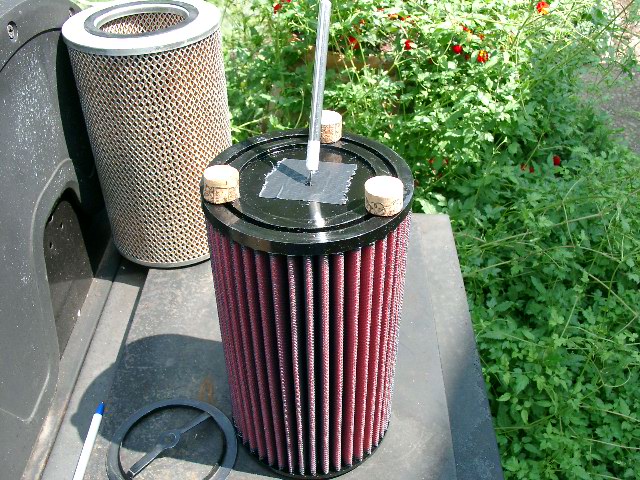
I
used a bit of black duct
tape for this. I just taped over the hole and then put an 'X'
slit in the tape with the Xacto knife.
My "test" showed it created a perfect seal and that when the test rod
was withdrawn there was far less stress on the
rubber surrounding the hole. If you had a perfectly round hole
punched this would likely be unnecessary.
Step 7 - Affix
the K&N Sticker
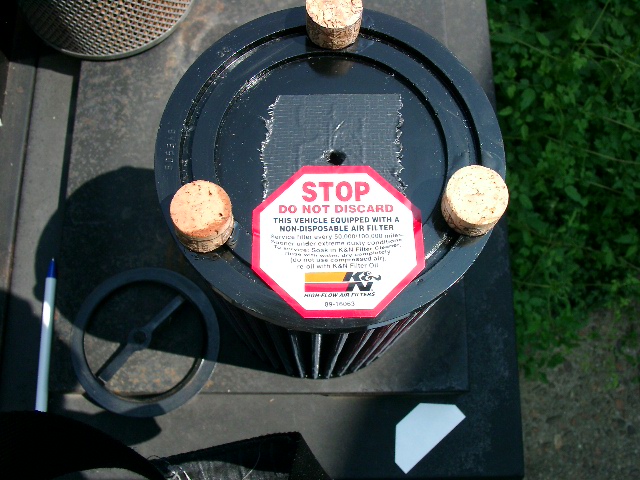
K&N
Air Filters are meant
to be cleaned and reused many times over many miles. Their
warranty is
for 1 million
miles of use or 10 years, whichever comes first. This one cost
$50.99
[in June 2007], which is less than the cost of
2 Crosland filters. It's an environmentally friendly choice as
well, since these don't end up in the trash stream
nearly as often as the original equipment filters would.
The recommended cleaning cycle is between 50K
and 100K miles of use,
depending on how dusty your conditions
are. K&N cleaning kits are available online or at any auto
parts store that carries the K&N line. The kits are easy
to find and are relatively inexpensive.
After all of this effort, I want to make sure
that anyone else who
might work on the car and who may remove the
air filter is warned that they shouldn't "just toss it and put in a
new
one
while I've got it out."
Step 8 - Pop
the ring in the open end and put the
"reengineered" K&N into the motorcar
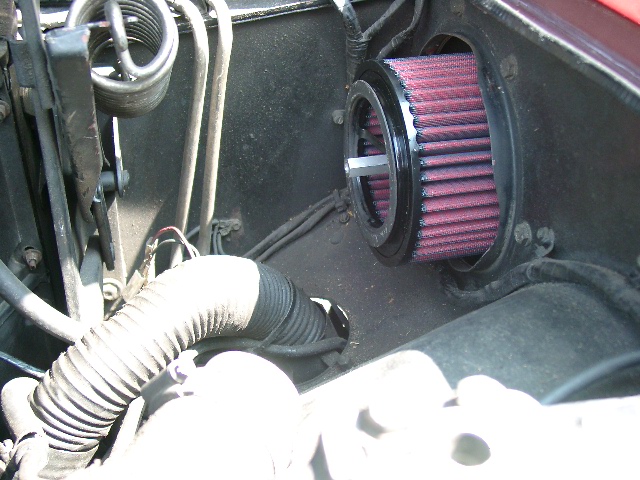
The
centering ring fits just
perfectly in these filters. I carefully slid the filter down over
the mounting rod and into the chamber followed by
putting the centering ring back on and screwing on the double ended
mounting nut. You will notice that the small hose I mentioned back
in Step 1 is tucked down and out of the way still.
Step 9 - External
K&N Sticker on filter housing
and reassembly
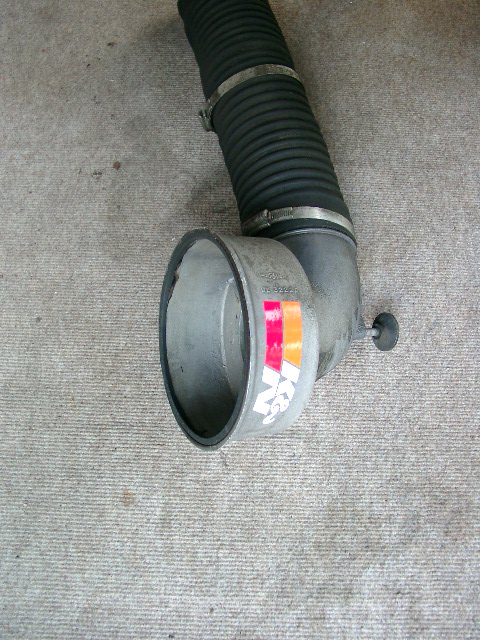
K&N
also supplies 2
stickers that can be put on external surfaces to let someone know that
their products lurk inside. I thought it was very useful to put
one
on the filter housing (and it can be very easily removed should
someone
wish to do so in the future).
In doing the reassembly, I follow these
steps:
1)
Get the filter housing back in and the knurled mounting knob
started into the mounting nut, but leave it all loose for now.
2)
Reattach the small hose that rests beneath the air intake hose
with its clamp.
3) Remove the air intake
hosing from the filter housing.
4)
Position the filter housing correctly and tighten things down
well.
5) Check to ensure that
the seal where the filter meets the housing is tight all
around.
It should be, but may not be if you cut your cork legs too short.
6)
Reattach the intake hosing to the filter housing. This
can be done with the housing in place if the clamp correctly placed
to
allow access to the screw.
7)
Reassemble the opposing end of the air intake hose as it was
when you started.
Step 10 - Celebrate
task completion with a Gin &
Tonic! [or substitute your favorite celebration method.
Please celebrate responsibly!]
Postscript: Shortly
after posting these
instructions, someone contacted me expressing concern that the seal
where the filter meets the cover
housing might not be complete and airtight. I have since checked
and it is. I have added a step or two to the reassembly
instructions to check
the seal these are in blue print.